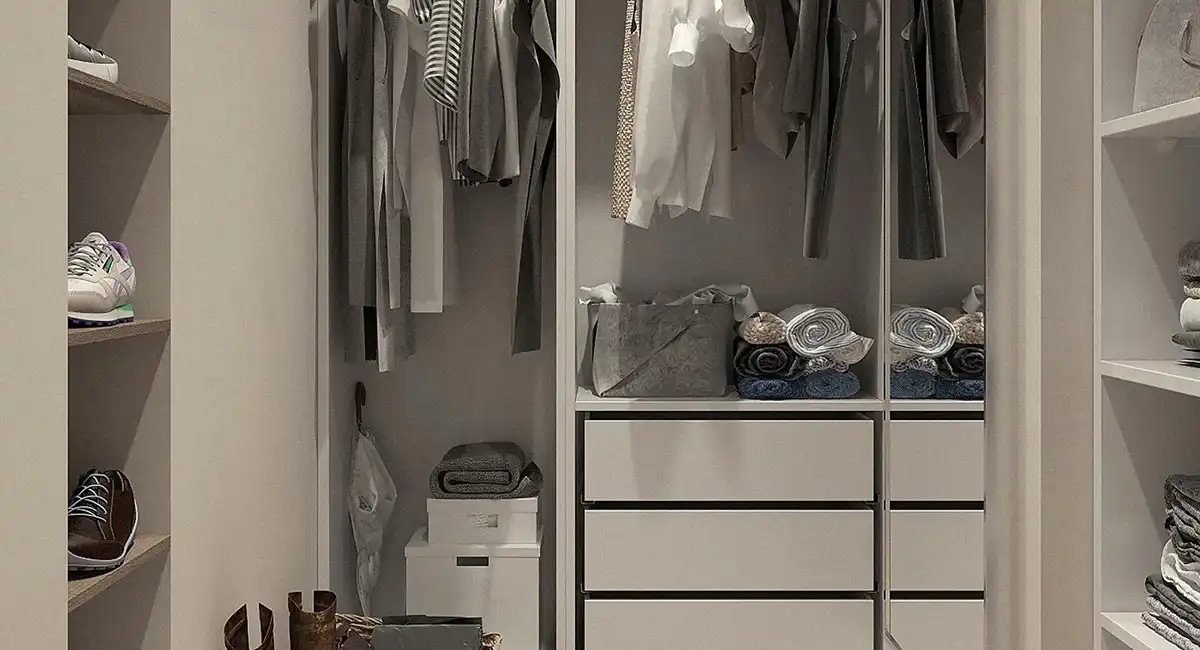
If you’ve ever wondered how to apply plastic edging to plywood, you’re not alone. The process is not as difficult as you might think. With a little practice, you’ll have a smooth, even surface. It also protects your project from the elements.

Edge banding protects from the elements

Using edge banding is a good way to protect plywood from the elements. The banding is usually made of a material such as PVC or wood and has an adhesive that binds the edges together. This type of banding is available in many different types and is relatively easy to apply. It is also very durable and improves the quality of plywood.

Using edge banding will improve the durability of plywood and protect it from damaging elements like termites. Many professionals recommend using this type of protection on all of their projects. Without edge banding, plywood can develop a rough edge that is easily attacked by termites, which can spread to the whole material.

It is easy to apply

Plywood is a versatile material that can be used to create a variety of furniture and cabinet designs. It’s a strong board that’s also environmentally friendly. Because of its many uses, it’s important to protect its edges. There are several methods you can use to cover the edges of your plywood furniture.

The first step is to glue the edge of the plywood. Make sure that you spread the glue on the entire plywood edge with a piece of wood.

It is easier to smooth than wood filler

Wood filler is an option that can be used on unfinished wood furniture. It can also be used to fill in scratches and gouges. Wood filler is also suitable for use on wood tabletops. Before applying wood filler, the wood surface must be sanded smooth. Once dry, wood filler can be painted or stained.

Wood fillers come in either a water-based or a solvent-based formula. Water-based fillers are typically faster to dry and less smelly. They are also easily cleaned up. If a water-based filler is too thick, you can dilute it with water. Solvent-based fillers, on the other hand, have a strong odor and can take an hour or more to dry.

It is inexpensive

Plastic edging is one of the most inexpensive types of edging. It typically costs between $2 and $5 per 50 feet. However, it can be difficult to place properly, so you may want to hire someone to do the installation for you. You can also get it with stakes so you can easily secure the edges to the ground.

You can also find more than one roll of edging at a time. When you install multiple rolls, use connectors. Slide one connector onto the end of each roll and push it down so it’s attached to the next piece. You can also install stakes every five feet to anchor the edges. Place them next to the edging, with the pointed end pointing downwards. You can then hammer them into the ground with a mallet to anchor them.

It is available in a variety of colors

Decorative PVC edging has a wide range of options to match the decor of any home. It can be found in several colors and can be easily glued in place. It is also available in various lengths. If you don’t want to use glue, you can also choose from different color options and textures.

PVC Edging is the best choice for decorative surfaces as it is extremely durable and easy to apply. It provides a smooth and seamless finish and gives the appearance of reliable materials. It is easy to install and maintain, and is ideal for residential applications. It also prevents moisture from penetrating the exposed board edges.

It is easy to trim

Adding a PVC edge banding to plywood is a simple way to improve its appearance. This edge banding is usually sold in rolls and is available in a variety of wood veneer or PVC colors. It is easy to apply, with a thin layer of adhesive secured with an iron.

Once the plywood has been glued, you can trim the edge banding to remove the excess. You can also add shims to prevent the banding from cutting the plywood through the edge. The thickness of the shims should be equal to the thickness of the banding. This will keep the trimmer from cutting too deeply.

What is Melamine Board

Melamine board is a decorative overlay for particleboard and MDF panels. It is a cheap alternative to concrete tiles, which are expensive and hard to keep clean. Melamine boards, on the other hand, are easy to clean and require only simple mopping to keep them dry. This makes them an excellent choice for busy areas.
melamine board is a decorative overlay for particleboard or MDF panels

Melamine is a thermosetting plastic material that transforms particleboard and MDF panels into decorative, durable surfaces. The material is scratch resistant, waterproof, and easy to clean. Its versatility makes it an excellent choice for kitchen cabinetry. It is a low-cost option for those looking for texture and color without the high cost of real wood.

Melamine Decorative Paper/Foils is a great decorative overlay that is often used on vertical surfaces. It is available in a huge range of patterns and colors, and can be used for cabinetry and ready-to-assemble furniture. It is also excellent for commercial environments, including retail settings.

It is durable

Melamine board is durable and strong and is an excellent choice for kitchen cabinets and panel furniture. Its durability is enhanced by its high flexural strength and stability in holding nails. It is also used for dry erase boards, office furniture and display counters. You can buy it in different sizes and thicknesses.

Aside from being strong, melamine board is also waterproof. Water can penetrate into particleboard and warp it, but melamine is more resistant to water. This is due to the fact that it is a laminate, which is less susceptible to expansion and contraction when temperature and humidity change. Nevertheless, the board is still susceptible to chipping and warping if not installed properly.

Another advantage of melamine board is its affordability. It is cheaper than plywood but still offers high durability. It also comes in a variety of colors. It is also easy to clean and does not age. In contrast to plywood, melamine does not absorb odors.

It is waterproof

Melamine board is a durable and waterproof alternative to wood. While it can warp and crack when exposed to water, it is very inexpensive and can withstand a variety of weather conditions. However, it is important to install it properly to avoid damage. Improper installation can lead to water seeping through the board and warping.

The material used to create melamine boards is called MDF, or medium density fiberboard. It is made from wood fibers and contains a thermosetting plastic. The melamine layer is applied to the surface of MDF or plywood.
it is a carcinogen

Melamine is a chemical that is found in large amounts in some products. It is not a carcinogen, but some people have been affected by it. It has been linked to kidney stones and a high risk of developing urinary tract cancer. Nonetheless, the European Chemical Agency (ECHA) has launched a consultation on melamine classification based on oral intake risk.

There are many products made from melamine, including plastics, adhesives, and tableware. The chemical is often found in food during the production process. Although melamine is not a carcinogen, it is a common component in tainted pet food, which has caused kidney stones in some children. It has been found in food scraps as well.

It is an irritant

Melamine board is made from panel paper that has been infused with a melamine glue solution. It is then cured at a low temperature. It is considered to be an irritant, but there is a limited amount of evidence that it is harmful. In addition to being an irritant, melamine is also toxic, and has been linked to urinary tract and kidney stones. It is not approved for use in food, and there are risks associated with inhalation. The resin used in melamine chipboard contains formaldehyde, which can be harmful if it is inhaled or absorbed into the body.

This chemical is used in many products, but some people have concerns about the toxic properties of the material. It is often found in products manufactured in China. In some cases, the material is added to products to make them look more protein-rich. This can cause kidney problems in children. Other times, melamine is used as a fake substitute for another material.

How to Apply Wood Veneer Edging

When working with wood veneer, it is important to know how to apply veneer edging. You can either use Real wood veneer edging strips or iron-on edge banding tape. This article will cover how to apply wood veneer edging, trim overhanging edges, and use edge banding tape.

Iron-on edge banding

Iron-on edge banding for wood veneers is a type of pre-glued edgebanding that is applied to the edges of wood veneer projects. It is available in sizes ranging from 2.1cm to 80m. It comes in rolls that are finely sanded and can be applied by hand, using an iron or a hot air blower, or with an edgebanding machine.

After applying edge banding, it is important to carefully remove the old glue and press the new one in place. Make sure the edges are aligned, but not overlapping. Then, using a wood block, press the edge banding down, pressing gently and firmly, to ensure the glue adheres to the wood. If you miss a spot, reheat the glue.

For wood veneer, this product can be used on MDF or plywood edges. It is available in White Birch, Cherry, and Red Oak. You can also buy non-glued edge banding, which can be applied with a clothes iron.

Real wood veneer edging strips

Using real wood veneer edging strips on plywood or other sheet goods can add a basic straight edge to your finished product. These strips are available in various thicknesses and are usually sold in rolls of 250 feet. They have a small overhang, making them easy to trim to a flush edge.

Ensure that you cut your strips to a thickness of a few centimeters wider than the thickness of the plywood you’re using. This will make the glue up process easier. You can cut the strips with a table saw, or you can use scrap plywood as a press. When cutting across the grain, it’s important to apply pressure along the entire length of the strip to hold it down. Remember, a veneer is soft and fragile, so be extra careful not to cut too close to the edge.

Before applying the strips to the plywood, make sure you sand the edges. If you’re applying them to the front surface of a cabinet, start with the longest edge. Leave a few centimeters of overhang on each edge. This way, you won’t have to spend much time trimming the strips and sanding them.

Using edge banding tape

Before you begin applying veneer, you should carefully prepare the edge of your substrate. The surface should be smooth and free of any cracks or other imperfections. Cut a length of veneer edge banding tape that is just wide enough to cover the entire surface. It is best to buy the tape with a width slightly larger than the thickness of the material you’ll be edging.

The edge banding tape can be applied in a few different ways. One way is by hand, but this may take a while. You can also buy industrial-grade machines to apply edging tape. This is a simple way to add a decorative finish and protect your furniture.

When you have applied the edge banding tape, you will need a flush trimming tool. This tool is inexpensive and designed specifically to trim fleece-backed wood veneer edge banding. It will not work well on paper-backed edge banding.

What Is Melamine Board Made Of

If you’re wondering “What is melamine board made of?” you’re not alone. It’s a popular material that’s made from a combination of paper and resin. Its translucency gives it a distinct look and allows for an array of applications. Moreover, melamine is extremely durable, making it an excellent choice for kitchen and bathroom countertops.

Resin

The material used to create melamine board is a type of synthetic resin. It is made from a combination of melamine and formaldehyde. These two resins exhibit enhanced water resistance, as well as heat resistance. This resin was developed by the American Cyanamid Company and first began commercial manufacture in 1939.

It is used to create a less flammable and self-extinguishing surface compared to solid wood. Melamine is also used in textiles and clothing. Its manufacturing process does not produce carbon emissions and does not cause any environmental damage. It is also very economical compared to solid wood boards.

The main constituent of melamine board is melamine resin. It is found in a wide variety of products, including particleboard, plywood, and MDF. It is durable, scratch-resistant, and easy to clean. These properties make melamine panels a great multi-purpose surface option.

Melamine-based resins are more resistant to moisture than other types of resins. Although more expensive, they have greater resistance to water attacks than urea-formaldehyde resins. Some manufacturers blend melamine with MUF resins to lower costs. These resins are also suitable for bonding low and high-pressure laminates.

Melamine board is a very durable surface, and it imparts fire-retardant properties to materials. It also resists bacterial and fungal colonization. However, despite its many benefits, melamine is toxic in some environments. Damage to melamine chipboard can lead to inhalation of melamine particles, which may cause health problems in some individuals. Further, the resin contains formaldehyde, which can be hazardous to the environment.

Paper

Melamine board is made of decorative paper that has a laminated look. It is also very durable and water resistant. It can be used to cover many bases, from MDF to chipboard. It can also be used for decorative purposes. It is commonly used for furniture. However, it is not recommended for use as a work surface.

It is produced using high-temperature, low-pressure processes. The paper is then impregnated with melamine resin, giving it extra strength and hardness. It is a perfect material for furniture, especially kitchens and bathrooms. It can also be used in flooring, although it is not recommended for outdoor applications.

Melamine board is a great option for furniture because it does not require painting or coating. The protective layer it forms naturally on the surface helps the furniture resist scratches and stains. It is also mold resistant and environmentally friendly, which are all important features for furniture. It is also known as artificial ecological board in the industry. It can replace wood or aluminum composite panels in certain instances.

The surface of a melamine plank can be decorative or plain. The melamine surface is created by laminating decorative paper onto a particle sheet. The melamine surface is nonporous, non-greasy, and discoloration-resistant. Its surface is often used as an interior cabinet, but is also used as an underlayment. However, it can be very slippery and heavy.

Translucent paper

The materials used in melamine board are made from polyethylene and Japanese paper. The two materials are then laminated together with a hot iron, creating a two-sided film. The two-sided lamination has a number of advantages. The paper backing is more stable than the plastic backing, and the Japanese paper is easily removed if it deteriorates.

Translucent paper is a material that is translucent to visible light. It can be made from different types of materials, and the process for producing it is different from that of melamine board. Translucent paper is often brittle, and the oil/resin-impregnated paper tends to become discolored and more brittle. This type of material can also soften in water, which can be dangerous.

Melamine board is a type of decorative board. It is a combination of layers of paper, which are coated with a layer of melamine resin. The papers are then soaked in melamine resin adhesive and laid on particleboard, medium density fiberboard, and hard fiberboard. The melamine board is a decorative composition and is often made in China.

The process of manufacturing melamine paper includes several different types of materials. The first is an impregnated decorative paper that is made from resin. The second is a thermosetting resin that is made from urea formaldehyde. The resin makes up approximately 33wt% of the material. It is combined with the facing paper to form a high-pressure decorative laminate product.

How Thick Is Laminate Sheet?

How Thick Is Laminate Sheet


There are several types of laminate sheets available. Each one offers different benefits. You can choose a thin sheet of 1.5 mil or a thicker sheet of 6 or 8 mil. These types of sheets are ideal for temporary pieces, decals, labels, and heavy papers. However, you may find that a 3 mil laminate is enough for most purposes. This type of laminate is thin enough to be folded and still provides adequate protection.

4mm

When choosing a 4mm laminate sheet, there are a few factors that you should consider. First of all, you should look for a laminate that is able to withstand the use of the space where it is placed. This means that it should be able to support the weight of the material underneath. It should also be able to resist heat and chemicals. You should also consider the material’s thickness. The thicker the laminate, the more strength it provides.

5mm

A 5 MIL laminate sheet provides moderate sturdiness for print materials and is great for everyday use. Because it can be scored and folded, this type of laminate is suitable for flat pieces that will be handled frequently. Its versatility makes it an excellent choice for menus and charts, as well as for dry erase memo boards.

6mm

Six mm laminate sheets are made from decorative paper that has been impregnated with melamine and phenolic resins. The resulting laminate is water resistant, flame retardant, and very durable. The process of creating these sheets requires a high temperature and high pressure.

8mm

Laminate flooring is available in different thicknesses. The most common thickness is 8mm, but there are also other types of laminate flooring available. While 8mm is not as thick as the standard 10mm, it is just as durable. However, it will not look as natural as a 10mm laminate and may even split more easily if the subfloor is not level. As such, it is important to choose the right laminate sheet thickness for your home.

10mm

A 10 MIL laminate sheet provides tremendous protection and rigidity. It is not easily bendable and is perfect for use on identification cards and reusable tags. It is also suitable for indoor/outdoor menus and reference sheets.

12mm

Laminates are a popular material used in home construction and renovation. They are made from multiple layers of paper that are combined with resins to create a durable surface. They are often used to cover MDF and wood. These sheets are incredibly thin and come in a variety of colours and prints.

15mm

The thickness of a laminate sheet is measured from the base to the top of the board. It is usually expressed as millimeters, but some laminate boards also include a protective pad attached. It is best to avoid those boards, as the padding does not contribute to the board’s thickness. Salespeople and materials often mislead consumers by including the padding.

20mm

If you need a 20mm thick laminate sheet for your bathroom or kitchen countertops, look no further. This product has an excellent moisture resistance and a variety of colour choices. In addition, it is easy to clean and is suitable for most commercial environments.

30mm

A 30mm thick laminate sheet is made of layers of materials that are bonded together to form a single sheet. These layers are usually less than 1.5mm thick, but you can find ones as thick as 30mm. The main purpose of a laminate sheet is to create a surface that is both waterproof and durable. Most laminate sheets are attached to a base substrate material, such as plywood, to give them a strong and stable base.

40mm

There are several different types of laminate. The most common is Formica, but there are others as well. Some of these include Polyrey, Westag Getalit, Arpa, and Abet Laminati. The process of producing laminate was first developed in 1913 by Formica.

How to Apply Laminate Sheets

How to Apply Laminate Sheets


When you’re installing laminate over a countertop, you’ll need to know how to apply the sheets properly. Here are some basic tips to help you get the job done right. Make sure that you apply the laminate on the right side of the countertop. Next, make sure that the laminate is lined up with the wall.

Contact cement

There are a few things to know about contact cement, and one of the most important is that it dries out. You can apply it using a toothpick or another object that can help you keep the two surfaces apart. After the contact cement dries, you can rub off the excess glue with your finger. Alternatively, you can replace the broken end cap with a new one.

Contact cement is an adhesive made of neoprene rubber, which creates a permanent, flexible bond. This type of glue is a great option for large surfaces, such as countertops and cupboards. It also works well on other types of materials, such as metal, glass, and leather. However, contact cement is best used in well-ventilated areas.

Dremel Multi Max with carbide blade

The Dremel Multi Max with carbide blade can be used for many tasks around the home. For example, it can be used for applying laminate sheets. The machine comes with a basic kit that includes a scraper, two blades, and a triangular sanding pad. You also get a supply of various grit sanding sheets and a grout removal tool. The tool is also available with a Multi-Flex attachment that can make scrolling cuts.

The Dremel Multi-Max with carbide blade is compatible with all Dremel oscillating tools. It has an extra wide cutting edge that makes it ideal for cutting both wood and metal. It is made from a high-quality, bi-metal material and costs $9.50.

Applying laminate sheets

When it comes to applying laminate sheets, there are several different techniques to use. First, use a wooden block and mallet to ensure good adhesion on the surface of the laminate. This will help to remove any air bubbles that might be underneath the surface. Next, use special moldings or thin edging strips to make the edges look neat. Finally, use two coats of cement on the surface of the laminate sheet and around the edges.

After preparing the surface, apply a plastic laminate file, which can be purchased online for less than $20. Be sure to use it in a downward direction and never use it backwards. After you’re done, you can clean it with a solvent such as lacquer thinner.

If you are looking for laminate sheet paper, the Dawei Decorative is a good choice, welcome to contact us for more details.

How to Bend a Laminated Sheet

How to Bend a Laminated Sheet

The first step is to determine the radius of the curve. It should be at least three inches. To determine this, draw straight lines perpendicular to the counter edges. They should intersect at a certain point. Then measure backwards from that point to the edge of the laminate sheet. Make sure that the curve will have a straight edge to prevent gaps, bubbles, and distortion.

Heat

When bending laminate, the first step is to measure the radius of the curve. The radius should be three inches or greater. Then, use a T-square to check the edge squareness. Heat bending is more difficult than cold bending, so take your time. Be sure to allow ample time for the laminate to cool.

Once the laminate has reached the correct temperature, you can begin bending the sheet. Wear gloves to protect your hands. Shape the sheet to the edge of the core, and keep moving it to avoid clamping the corners as the laminate cools. If the piece is too stiff, start by heating it up a little bit before moving it.

If you have a heat gun, you can use it to help the plastic bend around the curved surface. But be careful, as too much heat can cause the laminate to lose its shape and crumble. Also, make sure that the laminate is square from top to bottom, so that it will bend correctly around the curve.

Sanding

Before you start working on your laminate, it’s important to know how to sand it properly. For corners and curved edges, you will need to use a belt sander, which is important for getting a flat, clean finish. It’s also a good idea to use a heat gun, which helps to soften the material and make the bending process easier.

A torch or hot air gun will help to bend laminate around tight corners. You can also use a T-square to check that the edges are square. The laminate adhesive will set in a specific temperature when forming, so it’s important to check the temperature of the laminate before starting the bending process.

Inductive heating

Thermoplastic laminates that contain metal sheets can be bent using inductive heating. The heating process softens the boundary regions of the core layer while leaving the central region unscathed. The transfer time between the heating step and the bending operation is less than 5 seconds.

The temperature difference through the laminate depends on its thickness and the flange area of the laminate. For single-sided heating, the temperature difference is as high as 20 degrees, while for double-sided heating, it’s only seven degrees. The temperature difference through the laminate decreases over time as the flange area cools faster than the top side.

One of the advantages of inductive heating is its controlled heating. The process is also pollution-free and uses a high frequency inverter. It is important to choose the proper heating conditions in order to achieve the desired result.

Curves in the middle of the edge strips

To cut curves in the middle of the edge strips of a laminate sheet, start by measuring the width of the edges and cutting them a little longer than you need. Wood will shrink slightly when it changes shape, so measure the strips slightly longer than the finished piece. Use a diagonal line to mark the length of each wood strip. Once you have cut all the strips, add cork to the ends to prevent them from splitting and separating during assembly.

Next, measure the radius of the curve to make sure it is three inches or more. Then, draw straight lines perpendicular to the edge strips of the laminate sheet. Then, measure the length of these lines back to the edge. This will ensure that the edges remain square and that no bubbles or gaps will form.

Using a torch

If you are bending laminate around tight corners, a torch and hot air gun can help. You can also use a post forming machine. Different types of laminates are easier to bend than others. The forming temperature is about 170 degrees Celsius. A T-square is an important tool for identifying a square edge.

It is crucial to choose the correct tool for the job. Utility knives and laminate shears are both useful tools, but laminate shears are much more expensive than utility knives. While utility knives are cheaper and faster, they do not cut corners as well as laminate shears. In addition, utility knives may cause a bit of cracking and may not be as accurate.

If you are looking for wood grain PVC film for laminate sheet, you come to the right place. Dawei Decorative provides quality PVC decorative film for laminate sheet, please don’t hesitate to contact us for more details.

When installing sheet laminate flooring, you need to know how to do it correctly to avoid errors and maximize the appearance of the new floor. There are a few steps you should follow when installing sheet flooring. These steps are Preparation, Cutting, Staggering, and Installation. To learn more, read this article!

Installation

There are two basic methods for installing sheet laminate flooring. The first is to remove any obstacles from the room before installing the sheet flooring. The next step is to carefully remove the old flooring. This will make the process easier and ensure that the flooring is held down properly when reinstalled. You can also hire a professional to perform this task.

When installing sheet laminate flooring, make sure that you measure the space thoroughly and follow the manufacturer’s instructions. For example, if the room is wide, you should cut the vinyl sheet to the width of the room. This way, you’ll know how many planks you’ll need. Also, remember to leave about three inches of overage on the edges.

Preparation

Before installing sheet laminate flooring, you must prepare the floor area. You must clean the subfloor and ensure it is smooth and flat. If the subfloor is too soft, you can remove it, but most people will first remove the old floor covering and trim. If the floor area is uneven, you may need to add plywood underlayment.

You should cut around corners and other obstacles before installing the sheet laminate flooring. You should leave a small gap, which helps to prevent the sheet from bunching. Use the utility knife to cut the perimeter, and then use tape to adhere to adjacent pieces. It is important to avoid overlaps because they will create bumps on the floor. In addition, it is important to install a vapor barrier before laying the sheet laminate flooring.

Cutting

If you are installing laminate flooring on your home, the first step is to measure the surface you want to cover with sheet laminate. You can then order a sheet that is wider and longer than the surface. After you measure the area, use a utility knife to cut the sheet. You can also use a dry eraser to mark the edges. If you’re making a more complicated cut, you can use other tools, such as a saw.

A table saw works well for cutting sheet laminate flooring. The material is heavy and requires precision to cut and install. If the boards are separated incorrectly, they will chip.

Staggering

Installing sheet laminate flooring in a staggered pattern can avoid problems such as gaps or warping. Staggering the planks will also ensure that the planks blend together. The process of staggering the floor is quite simple. Read our guide to find out how to do it properly.

To stagger your flooring, measure the width and length of the room before starting the installation process. Then, divide the width of the room by the width of the planks. This will determine the number of planks that will be needed to cover the entire floor. Make sure that the planks in the first and last rows are the same size.

Staggering when installing sheet laminate flooring is important to avoid creating straight lines that can distract from the beauty of the flooring. The spacing between adjacent boards should be a minimum of one board width apart. This is because staggered boards add more structural integrity to the flooring.

Underlayment

When installing sheet laminate flooring, you’ll want to use a high-quality underlayment that is specifically designed for laminate floors. You’ll want to choose a product with STC/IIC ratings, which indicate how well the material will absorb noise. The higher the STC/IIC rating, the less noise your floor will absorb. The sound-absorbing properties of these materials are most noticeable in the rooms underneath your laminate floor.

Underlayment is typically 1/4-inch thick, with smooth top faces and square edges. You can purchase it in rolls of four-by-eight-foot sheets. Some manufacturers also sell pre-installed pads for faster installation.

What is Laminate Sheet

If you’re wondering what is laminate sheet, you’ve come to the right place. This material is a cost-effective alternative to hardwood flooring and is highly scratch-resistant. It’s also a durable, decorative material that can be refinished or repainted. If you’re considering installing a laminate sheet in your home, here are a few facts that will help you make an informed decision.

Decorative material

Laminate sheets are made from a combination of paper and plastics. They are used as wall paneling and furniture surface materials. The material is created by mixing two or more different types of paper and then pressing them together to create a rigid sheet. The main ingredients used to make laminates are listed below.

The process of making decorative plastic laminates involves several steps.

First, the top layer, called the decorative layer, is made from paper that is colored, patterned, or printed.

The paper is then impregnated with a type of resin called melamine. The melamine resin is highly resistant to wear and tear.
The decorative layer is then cut into sheets of similar widths and lengths.

Finally, a thin, transparent paper layer, called the overlay, is applied to the top layer.

The coating layer is made from small particles of alumina, polymer particulates, and microcrystalline cellulose. Usually, the composition is based on five to ten parts of micro-crystalline cellulose. Then, the decorative paper is impregnated with a suitable laminating resin, which is typically a thermosetting resin.

Cheaper than hardwood flooring

In many cases, the laminate sheet is a cheaper alternative to hardwood flooring. The price of laminate flooring is usually between $3 and $7 per square foot, depending on the type and quality of the material. However, cheaper laminate brands may not last as long and may need to be replaced sooner. Laminate sheets also require less maintenance than hardwood, but are more likely to show signs of wear and tear.

While hardwood may cost a lot more than laminate, the cost to install it varies greatly depending on the type of wood you choose. Hardwood flooring can be as much as two times more expensive than laminate.

Laminate Sheet Has Good Features

Durable

A durable laminate sheet is a composite material that has a flexible and hard synthetic material layer in an array. In one embodiment, the laminate sheet includes a flexible material layer 30 that includes a hinge portion 120 and an affixing portion 140. The hinge portion 120 extends to an outer end 70 of the hinge side, while the affixing portion 140 is fixed to the hard synthetic material side 220.

A durable laminate sheet is made from several layers that are adhered together to form a bonded core-to-core bond. In some cases, the layers may not adhere to each other properly, resulting in peeling or loss of the laminated material. These problems can be particularly troublesome in security document applications, as a weak bond may be compromised.

Scratch-resistant

A scratch-resistant laminate sheet is made of a hard material that resists scratches and stains. These sheets are usually backed by layers of kraft paper. They are available in both thick and thin grades. Some sheets are also available in colors and designs. Some manufacturers even offer warranties for their products.

Scratch-resistant laminate sheets are not only durable, but they are also attractive. The top layer of the laminate is a high-strength melamine resin. They can withstand abrasion, impact, and scratches, which makes them an excellent choice for homes and offices with pets and children.

Recyclable

There are a number of options for recycling laminated paper. Some companies will collect your laminated paper and separate the plastic from the paper, allowing you to recycle both materials at the same time.

If you prefer a more eco-friendly alternative to plastic, you can use laminated paper made of biomass materials. These sheets are biodegradable and break down more quickly in landfills than traditional laminates. They are also far more expensive than their petroleum-based counterparts. Another option is to use soy polymer laminates. Soy proteins are biodegradable and break down much faster in landfills than conventional laminates.

The production process of HPL begins with raw materials processed into decorative papers called core and overlay. They are then pressed and sanded. Once they are finished, they are shipped to end users. In most cases, HPL manufacturing plants are in charge of controlling the amount of recycled material in their products.

How to Cut Laminated Sheets Without Chipping

If you want to cut laminate sheets without chipping, you can cut it using a utility knife or a saw blade with many teeth. You can also use a belt sander or a sanding block. But before you can cut it, you should be aware of the dust that it may produce.

Cutting laminate sheets with a utility knife

There are a few tips to remember when cutting laminate sheets without chipping them. First, be sure to use a clean blade on your utility knife. It’s also best to use heavy-duty scissors for cutting laminate sheets. Another tip is to use a drywall square to trace the shape of your cut. This will help you start from a corner and minimize the amount of time that you need to spend cutting the sheet.

Another way to prevent chipping is to use a finish blade with lots of teeth. This will make it easier for you to see the markings. You’ll also reduce the risk of chipping by carefully measuring and masking the edges of the sheet with tape. Finally, when cutting Formica laminate sheets, you’ll want to use one hand and be sure to use a steady hand.

Cutting laminate with saw blades that have several teeth

There are many advantages to using a saw blade with several teeth for cutting laminate sheets. It will help you cut the material without chipping or cracking. The saw blade should be sharp and clean before you start cutting the laminate. It is best to wear protective equipment while cutting the material since sawdust can be harmful.

Before cutting the laminate, mark the line on the surface using masking tape. You can also use a circular saw with fine teeth. Make sure the blade has a sharp edge that cuts the material without chipping or damaging the finish.

Using a belt sander or sanding block

A belt sander or sanding block is an excellent tool for smoothing the edges of laminate sheets. The sanding process will make the countertop appear smoother and will prevent chipping. Ideally, you should use a downward motion when sanding the laminate. Afterward, vacuum up the fine particles. While sanding, use safety glasses or a face mask to protect your eyes.

Before cutting the laminate, it is important to smooth the surface of the sheet to prevent chipping or dings. Using a belt sander or scraper with an 80-grit belt will help you cut the material without causing any chips or nicks. Always make sure to use a sharp bit, since a dull one may cause the sheet to slip and scratch. If you use a file, make sure to hold the blade at a 45-degree angle from the direction you’re cutting. Also, use a light touch and a steady pull rate.

Using a circular saw

Using a circular saw for cutting laminate sheets is possible, but be sure to be careful and wear protective gear. The blades can catch in the laminate and fly toward you. Check the blades for sharpness before cutting. Also, make sure the saw is stable and that the table saw fence is parallel to the outfeed.

One way to minimize the risk of chipping is to use a power saw that runs on the upstroke. This way, you’ll have a smooth, precise cut. Another way to minimize the risk of chipping is to cut the laminate sheet from the backside. You can also use a straight piece of wood as a guide to cut a straight line. To avoid overlapping, set the wood at a distance equal to the distance between the guide mark and the edge of the blade.

Using a jigsaw

Using a jigsaw for cutting laminate sheets requires special safety procedures. It is best to use a glass or ceramic bit to avoid chipping the laminate surface. Moreover, it is necessary to follow the safety guidelines on the table saw.

It is essential to make clean cuts when fitting laminate panels, and that is not possible with a regular jigsaw blade. Fortunately, there are jigsaw blades available that have reverse teeth. These blades will cut the laminate on the downstroke instead of the upstroke, which prevents chipping. Choose one with a medium to high tooth count.

Make sure you use a blade that matches the type of material you are cutting. A jigsaw blade designed for wood or softwood will cut the wood efficiently. However, it will bend when cutting thicker boards, resulting in a beveled edge. Always make sure the blade you are using is sharp so that it doesn’t make a beveled edge.